Rear Top Rail for Airsoft M4/m16
Rear Top Rail for Airsoft M4/m16
Wiki


How To Detach a M4 Airsoft Rifle
The M4/M16/AR15 is the most pop airsoft rifle in the Usa. That's non surprising because that it's the master assault burglarize used by the U.S. military. And then chances are y'all probably accept an M4 rifle or its variant. This commodity shows you lot how to disassemble this rifle. From this point forward, we will employ the term M4 to identify the M4 burglarize and all of the variants.
Comments & Discussion >>
Separating the Upper and Lower Receivers
The receiver is the main body block at the center of the M4 rifle. The receiver can be separated into two: the upper and lower receiver. The upper receiver is the zipper point for the front track/handguard, the external barrel, the inner barrel, and the hop-upward. The lower receiver carries the gearbox, the rear shoulder stock, motor, and handgrip.
To divide the receiver, tap out the receiver pin at the front end of the receiver, right nether and behind the runway/handguard. The photo below shows the receiver pin tapped out slightly.
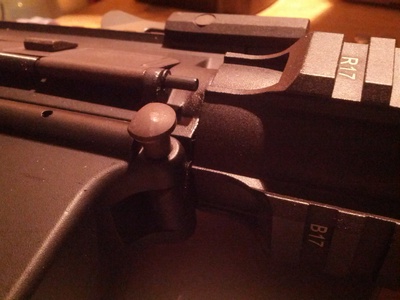
Once the receiver pin has been completely tapped out, you lot can pull the upper receiver forrard, while pulling the lower receiver backward. On some M4 airsoft guns, it is very tight. You lot can put the forward assist button to good use in this case.
The forward help button is the round push button on the right side of the upper receiver. It does nothing on an airsoft gun (at least on near airsoft guns; some realistic training airsoft rifle make use of it). Hold the handgrip with your right hand. Concord the track/handguard with your left hand. Employ your right thumb on the frontward assistance push button. The receiver should split up with some pressure.
Comments & Discussion >>
Removing the Handgrip
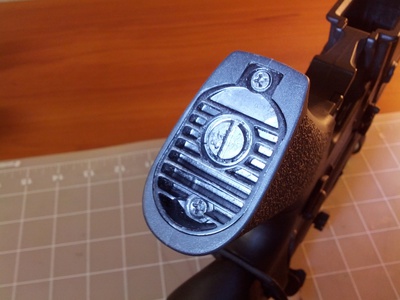
On a version 2 gearbox AEG, such as the M4, the handgrip is fastened to the lesser of the gearbox and houses the motor. The base of the handgrip has a plate with ii minor screws (see photograph beneath). The big apartment screw in the middle is to adapt the motor tension to the gearbox. Unscrew the two small screws to remove the plate.
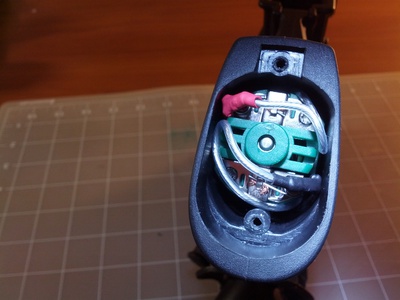
Later on removing the handgrip plate, you'll come across the motor and fastened wires (see photo below). Disassemble the wires and remove the motor.
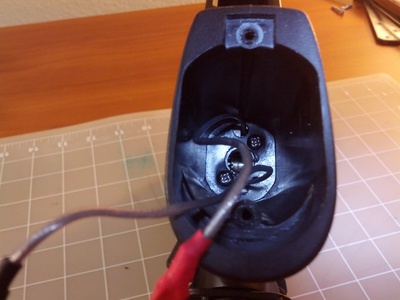
Side by side step is to remove the handgrip. There are 2 screws inside the motor slot (see photo beneath). Unscrew the two screws. Be careful that the screws don't fall into the gearbox. Once you've unscrewed the handgrip, y'all can remove information technology easily.
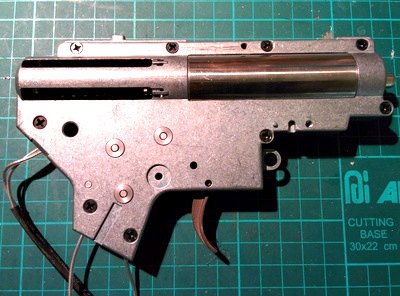
Later removing the handgrip, you'll come across the bottom of the version 2 gearbox.
Comments & Give-and-take >>
Split up the Gearbox From the Lower Receiver
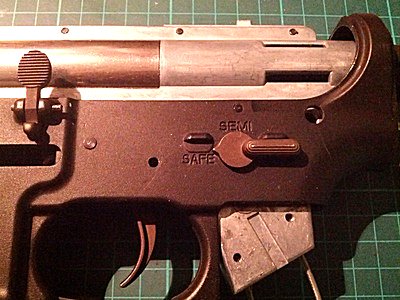
To separate the gearbox from the lower receiver, you'll have to tap out two receiver pins with a punch and a rubber mallet. The smaller receiver pin is just forward of the selector switch. The bigger receiver pin is backside, toward the top from the selector switch. The photo below shows the two receiver pins accept already been tapped out.
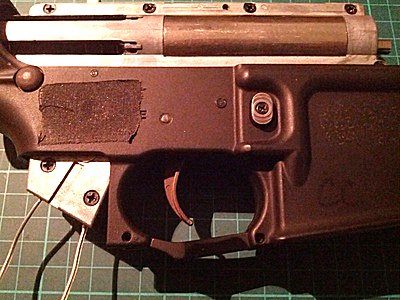
Next, you'll have to disassembly the mag release. Flip the receiver to the other side. Employ a precision screwdriver to unscrew the magazine release push button. Exist conscientious y'all don't lose the spring nether it.
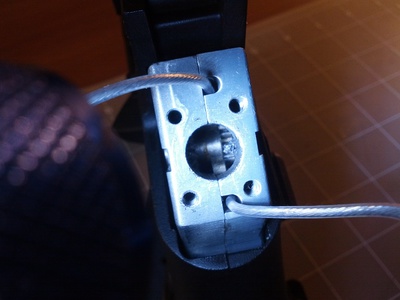
Side by side, you accept to remove the commodities take hold of latch mechanism. Pull the gearbox out of the receiver slightly until you accept revealed the latch (come across photo below). Unscrew the screw that is keeping the latch mechanism in identify.
Switch the firing mode selector to semi-auto; otherwise, it would exist difficult to become the gearbox out of the lower receiver. Once you lot've washed all that, you can at present wiggle the gearbox out of the lower receiver. Be conscientious the wiring does not grab on the lower receiver.
Comments & Discussion >>
Opening the Gearbox
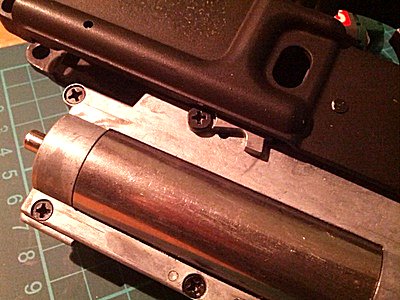
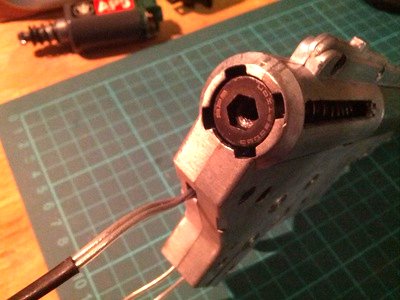
Earlier opening the gearbox, run into if your gearbox has a quick change leap feature. Photo beneath shows an APS gearbox with a quick change spring guide (changeable with a 7mm hex wrench). If so, remove the leap guide and the spring get-go. It will make your gearbox disassembly much easier.
Unscrew all of the screws on the gearbox (run across photo below). If yous can't remove the spring first, concord the gearbox shell downwardly as you unscrew the final spiral.
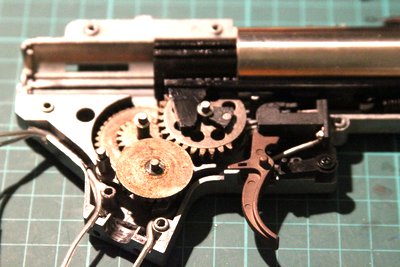
If the chief spring isn't removed, utilize a screwdriver to go on the spring guide in place as yous dissever the gearbox. Just if you take a quick change bound system, you tin just lift the gearbox shell. The following photo shows the gearbox internals.
Comments & Word >>
Attachments
- APS Quick Modify Spring Organisation (Small-scale).jpg (28 KB)
- Gearbox Receiver Pins Removed (Small).jpg (38 KB)
- Latch (Small).jpg (38 KB)
- Mag Release (Small).jpg (37 KB)
- Receiver Pin (Pocket-sized).jpg (48 KB)
Rear Top Rail for Airsoft M4/m16
Posted by: strattondingethey.blogspot.com
0 Response to "Rear Top Rail for Airsoft M4/m16"
Post a Comment